

Wait! Before you start popping kernels there’s something you should know!
It turns out that those corn kernels can be used to grow your very own mushrooms. Magic mushrooms that is. Ok, we know what you’re thinking — why do we need to grow shrooms from scratch when we have access to your trip-tastic grow kits and even more convenient fresh magic truffles? Well, turns out some people like to get down ‘n’ dirty from spore to shroom. And why not? We love mycology as much as the next psychonaut, and we love to research all the different ways that mushrooms can thrive — especially if there’s a psychedelic trip to be had. So for all those who loved our PF Tek tutorial, here is how to grow magic mushrooms with popcorn tek!
Popcorn Tek Pros and Cons
So you wanna use popcorn kernels as grain spawn? Let’s see the pros and cons of this a-mais-ing grain!
Pros:
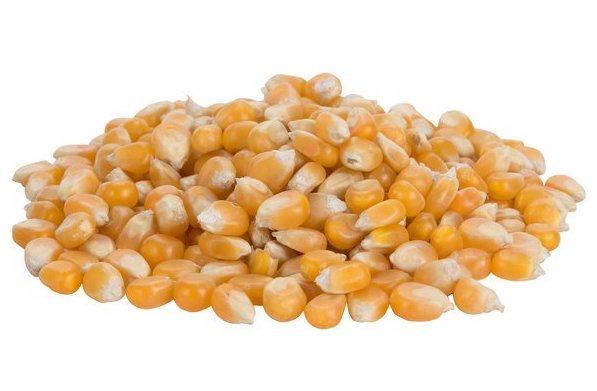
Popcorn kernels are widely available, you can buy them in the grocery store.
Doesn’t clump, and stays relatively hard after soaking so it is ideal for when you have to shake/stir you grain later.
You do not need to clean it as it is cleaned for consumption straight from the packet.
Contamination rate is low.
Anything you don’t use, you can pop and chow down on!
Cons:
Can be relatively expensive if not bought in bulk.
Generally takes a bit longer to colonise than other grains.
What You Will Need For Popcorn Tek
- Pressure cooker
- Large mason jars
- Adhesive tape
- Pillow stuffing (Poly-fil)
- Latex gloves
- Rubbing alcohol
- Strainer
- Aluminum foil
- Hand sanitizer
- Lighter
- Lysol or similar disinfectant spray
- Spore syringes
- Spores from your chosen shroom strain
- Alcohol lamp or Bunsen burner
- Large plastic tub/tupperware
Let’s Get Poppin’!
- Once you have your supplies primed and ready it’s time to get started. First soak 2 bags of your popcorn kernels (thats around 4lb or 1.8kg). Place it in a large bowl and fill with water until it is 2 inches above the popcorn level, then leave to soak for 24 hours. This will make enough grain spawn for 6 mason jars.
- While your popcorn kernels are soaking you can start prepping your jars. (Carefully) stab 2 holes in each lid. A big one in the centre and a smaller one nearer the edge. You can do this with a drill or by hammering a nail in.
- The big central hole is for the pillow stuffing. This allows CO2 to exit the jar while preventing contaminants from coming in. The lil’ edge hole is for your spore syringe.
- Stuff the stuffing in the big hole, and put a strip of tape over the small inoculation hole. .
- Once your popcorn has soaked for a full 24, strain the grain and rinse it off too. Pour the popcorn into a pot full of fresh water, again two inches from the surface of the popcorn. Put the pot on the stove and bring to the boil. Do not cover.
- Keep it on a low boil for 40 minutes. Stir now and then to prevent burning or sticking.
- After the 40 mins, check out your corn kernels. If you can squish them between your fingers they are ready! Strain it, then shake and mix it about until they corn kernels are dry to the touch (should be about 15/20 minutes). This is important to prevent excess water getting in the jars.
- Fill each jar to the brim with your corn, and then close the lid. After this cover the lids with good quality aluminium foil.
- Put the jars inside the pressure cooker, with the pressure set for 15psi. Cook them at this pressure for 50 minutes. When they are done, turn off the heat and let the jars cool down overnight.
Popcorn Inoculation Station!
- Make sure you have fully prepared your inoculation station. You can do this during the jar-cooling era. Spray the area with your Lysol (other detergent sprays are available!) to kill any germs and microbes. Make sure you regularly wipe down your surface and sanitise your hands throughout this process. When the jars are cool and everything is sparkling clean you can put on your gloves and start to inoculate!
- Shake your spore syringe vigorously for a minute or so, to spread the spores and separate any clumps. Light your alcohol lamp or bunsen burner and heat the syringe needle until it is red hot. Let it cool until its colour returns, then puncture the tape of the small hole in your lid. Aim it towards the inner side of the jar. Inject 2ml of liquid.
- Remove the syringe and cover the hole you just made with a fresh piece of adhesive tape. Repeat this process until all your jars have been inoculated/ you run out of spores.
- When you have treated all the jars, place them in a cool dark area like a closet or cupboard. Keep them away from sunlight. Ideal temperature is 22/23°C or 73°F.
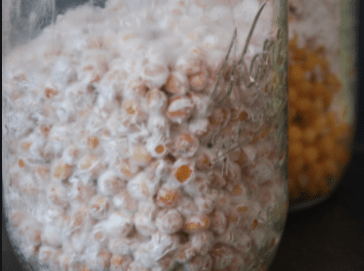
It should take between 4-14 days for lovely, fluffy, white mycelium to start forming. Once the jars are about 70% mycelium, shake them gently from side to side so the mycelium definitely spreads evenly throughout the jar. Once the whole jar is colonised, leave it 5 more days for luck (and so you can be sure of FULL colonisation.)
Inoculating Your Substrate With Your New Popcorn Grain Spawn
1. Choose your favourite substrate (i.e. woodchips, sawdust or pasteurized rye grains, to name a few.) Fill a large plastic tub with your chosen substrate and then empty your jars of mycelium into it. Gently shake it about to mix your corn-spawn mycelium with your substrate.
2. 10 short days later your tub will be filled with mycelium! Introduce some fresh air into the mix every now and then by putting the tub(s) in a room with natural light 3 times a day for 30 minutes. Got that? 3 X 30. The aim is to get rid of the CO2 as your mycelium gets stronger.
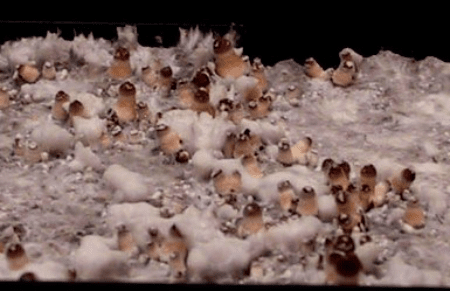
After a couple of weeks you’ll see pinheads starting to form in the tub. These are tiny baby magic mushrooms!
So there you have it! Popcorn — not just the most marked-up treat price-wise of all time — also a great grain from which to grow shrooms! And who needs movies when you’re trippin’?
Lastly, its good to remember that though a fun experiment, growing and inoculating shrooms from spore to fruit is pretty hard with a relatively low success rate, until you know what you’re doing. To avoid disappointment, why not check out our range of magic mushroom grow kits? They arrive already bursting with mycelium. OR take it one step easier and just go for some ready-to-eat magic truffles? The route you take is your choice — but the destination is always a trip!


